PHP Artisan commands list with Laravel 5.4
Working with Laravel without PHP Artisan would be no so efficient. Laravel delivers us list of mostly used commands by daily developer’s activities. You need to know this list and use the commands to speed up your efficiency in coding.
Some of the php artisan commands are shown in action in my laravel project where I build book management rest api. It’s good to you to verify in practice what commands are especially used.
Displaying list of PHP Artisan commands
In order to run the Artisan lists of commands you need to type … the command:
php artisan
As a result of running the command you should be able to see the view like below:

Full list of php artisan commands list with examples will be presented below.
You can use this place to come back and find the right command for you.
Artisan commands list with examples
  clear-compiled       Remove the compiled class file
  down                 Put the application into maintenance mode
  env                  Display the current framework environment
  help                 Displays help for a command
  inspire              Display an inspiring quote
  list                 Lists commands
  migrate              Run the database migrations
  optimize             Optimize the framework for better performance
  serve                Serve the application on the PHP development server
  tinker               Interact with your application
  up                   Bring the application out of maintenance mode
 app
  app:name             Set the application namespace
 auth
  auth:clear-resets    Flush expired password reset tokens
 cache
  cache:clear          Flush the application cache
  cache:forget         Remove an item from the cache
  cache:table          Create a migration for the cache database table
 config
  config:cache         Create a cache file for faster configuration loading
  config:clear         Remove the configuration cache file
 db
  db:seed              Seed the database with records
 event
  event:generate       Generate the missing events and listeners based on registration
 key
  key:generate         Set the application key
 make
  make:auth            Scaffold basic login and registration views and routes
  make:command         Create a new Artisan command
  make:controller      Create a new controller class
  make:event           Create a new event class
  make:job             Create a new job class
  make:listener        Create a new event listener class
  make:mail            Create a new email class
  make:middleware      Create a new middleware class
  make:migration       Create a new migration file
  make:model           Create a new Eloquent model class
  make:notification    Create a new notification class
  make:policy          Create a new policy class
  make:provider        Create a new service provider class
  make:request         Create a new form request class
  make:seeder          Create a new seeder class
  make:test            Create a new test class
 migrate
  migrate:install      Create the migration repository
  migrate:refresh      Reset and re-run all migrations
  migrate:reset        Rollback all database migrations
  migrate:rollback     Rollback the last database migration
  migrate:status       Show the status of each migration
 notifications
  notifications:table  Create a migration for the notifications table
 queue
  queue:failed         List all of the failed queue jobs
  queue:failed-table   Create a migration for the failed queue jobs database table
  queue:flush          Flush all of the failed queue jobs
  queue:forget         Delete a failed queue job
  queue:listen         Listen to a given queue
  queue:restart        Restart queue worker daemons after their current job
  queue:retry          Retry a failed queue job
  queue:table          Create a migration for the queue jobs database table
  queue:work           Start processing jobs on the queue as a daemon
 route
  route:cache          Create a route cache file for faster route registration
  route:clear          Remove the route cache file
  route:list           List all registered routes
 schedule
  schedule:run         Run the scheduled commands
 session
  session:table        Create a migration for the session database table
 storage
  storage:link         Create a symbolic link from "public/storage" to "storage/app/public"
 vendor
  vendor:publish       Publish any publishable assets from vendor packages
 view
  view:clear           Clear all compiled view files
clear-compiled
Every time you run project or different commands the laravel framework generates some cache files in bootstrap/cache folder. These files are compiled.php and services.php. Both of them keeps list of mostly used classes/services needed by your project configuration.
Running the command removes all the files from cache folder:
php artisan clear-compiled |
You should get information “The compiled services file has been removed.”
serve
In developer environment we sometimes need to verify changes we made as fast as possible. We need to run the whole project without any additional configuration setup. At this point, the serve command is helpful, which runs the entire project as a local server under the port 8000.
php artisan serve |
In order to see the website you need to type in your web browser the address http://localhost:8000

make:auth
Using the make:auth command you can generate working mechanism with logging, registration, routes, generated views and auth controller.
php artisan make:auth |
What exactly we achieve using the command is seven created files and one modified (routing):
- HomeController.php
- home.blade.php
- login.blad.php
- register.blade.php
- email.blade.php
- reset.blade.php
- app.blade.php
- web.php
Home controller is very simple and the only responsibility of it is to run home template and secure access using auth middleware:
namespace App\Http\Controllers; use Illuminate\Http\Request; class HomeController extends Controller { /** * Create a new controller instance. * * @return void */ public function __construct() { $this->middleware('auth'); } /** * Show the application dashboard. * * @return \Illuminate\Http\Response */ public function index() { return view('home'); } } |
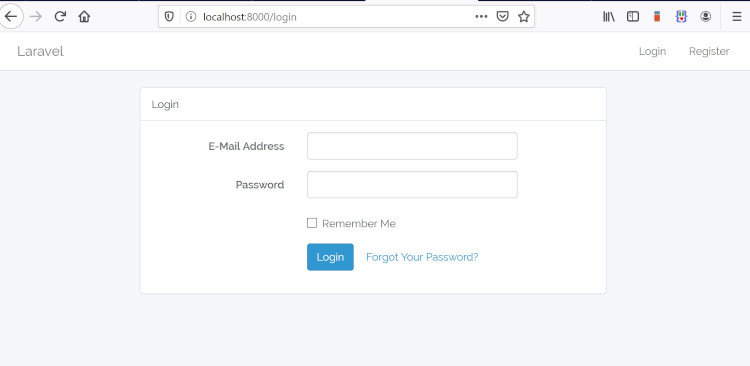
When you run locally laravel application you will see beautiful html layouts with blade templates for logging:
and for registering as a result you should see:
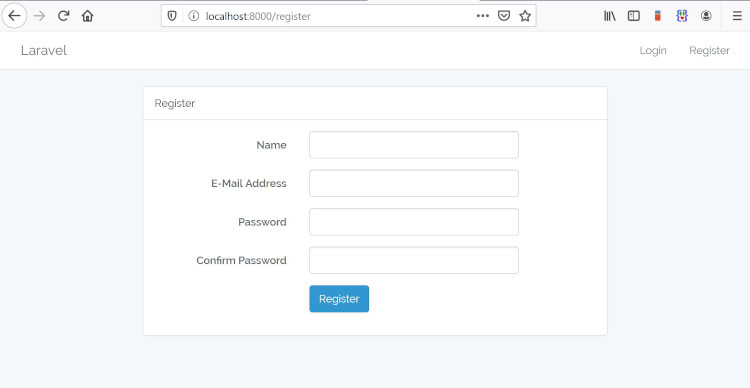
The last change is in web.php file. Our command automatically generated code responsible for handling home routing and currently the file looks like:
Route::get('/', function () { return view('welcome'); }); Auth::routes(); Route::get('/home', 'HomeController@index')->name('home'); |
If you want you can remove the line with main routing to default welcome page into home page that we created.
When you run default migrations calling php artisan migrate and you go through registering process you can even logged into home page.
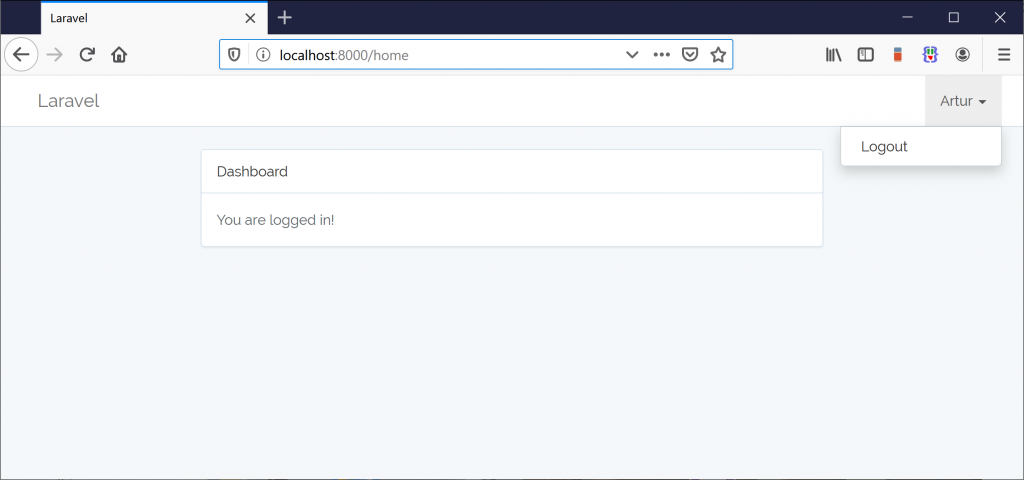
I like the idea without any coding I can achieve lots of working codes both on controller and view sides.
make:command
When you want to automate some activities around artisan command line tool you can do it creating you own command. The syntax for creating the command is very simple:
php artisan make:command GetPageTitle |
Here GetPageTitle is a name of php class that will handle the new command. The class extend Command class:
namespace App\Console\Commands; use Illuminate\Console\Command; class GetPageTitle extends Command { /** * The name and signature of the console command. * * @var string */ protected $signature = 'command:name'; /** * The console command description. * * @var string */ protected $description = 'Command description'; /** * Create a new command instance. * * @return void */ public function __construct() { parent::__construct(); } /** * Execute the console command. * * @return mixed */ public function handle() { // } } |
As you can see we have one method handle() that defines how our command works and two fields $signiture and $description.
The description field is obvious because this is just a description of a command. You can type here any descriptive information.
Definately $signiture field is the most interesting because here we can define in general case three things:
- name of the command that we use in command line
- command arguments
- command options
In our command for getting title of a website the signature might look like:
protected $signature = 'page:title {url} {--limittitleto=}' |
The url is an argument that we can pass to the command and limittitleto is and option that we can pass number of first letters that we want to get from the title page. We can call this command using the syntax:
php artisan page:title www.amazon.com --limititleto=20
The final implementation of command class is:
namespace App\Console\Commands; use Illuminate\Console\Command; class GetPageTitle extends Command { /** * The name and signature of the console command. * * @var string */ protected $signature = 'page:title {url} {--limittitleto=}'; /** * The console command description. * * @var string */ protected $description = 'Command that fetches title from given url'; /** * Create a new command instance. * * @return void */ public function __construct() { parent::__construct(); } /** * Execute the console command. * * @return mixed */ public function handle() { // Get all //$arguments = $this->arguments(); //$options = $this->options(); // // Get single Parameters $url = $this-.argument('url'); $limititleto = $this-.option('limititleto'); // function to get title from url given as input argument // and limit this to the first $limititleto chars // the logic of the function is not so important here $title = fetchPageTitle($url, $limittitleto); $this->ine('Your title is: ' . $title); } } |
More details about creating own commands in php artisan command line tool you get get from official Laravel website here.
make:controller
This is very handy command that helps us to create any controller’s class. With one line of code we receive full Http directory structure with the class:
php artisan make:controller BookController |
As a parameter you should use your controller name. Here we used BookController.
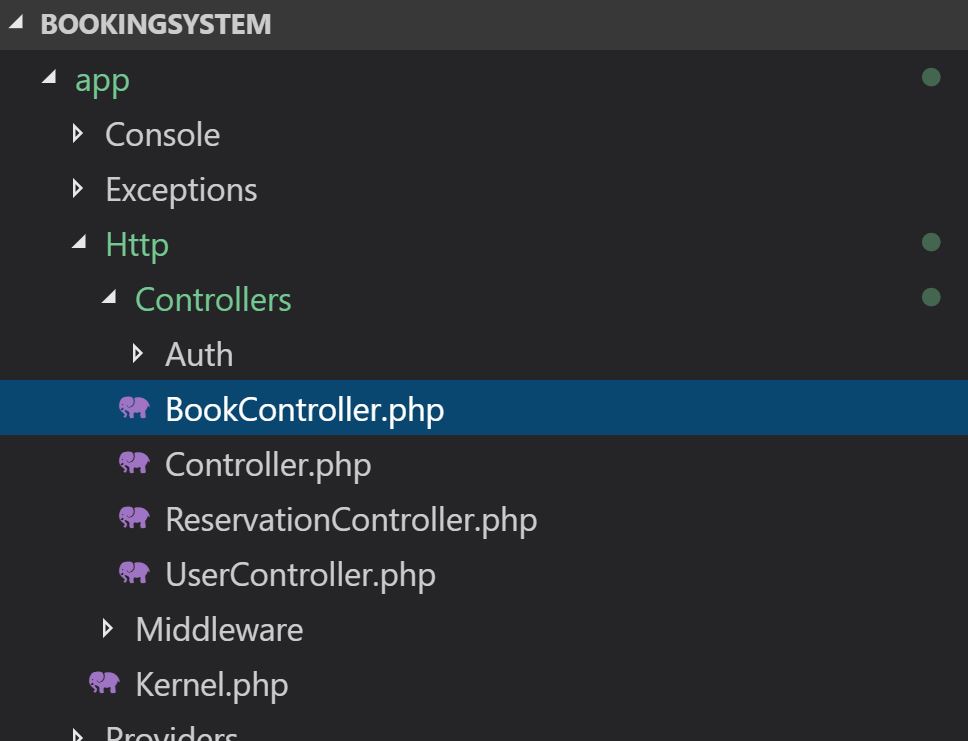
As a result we get empty BookController class like:
namespace App\Http\Controllers; use Illuminate\Http\Request; class BookController extends Controller { // } |
make:event
Laravel framework supports events driven architecture as default. You can create as many events in the systems as you want. You can create synchronous and asynchronous events.
Like always in order to create the template code we can use artisan. In our case generating new event is possible by running the command:
php artisan make:event EbookWasDownloaded |
We need to pass as a parameter name of event that we want to create. Here I typed the name EbookWasDownloaded that should suggest that user downloaded ebook from our website.
How the code of the event looks like ? Well, we can see that new folder Events is created under app and inside we have one file EbookWasDownloaded.php. Inside the file we have small class with default constructor and one method broadcastOn.
namespace App\Events; use Illuminate\Broadcasting\Channel; use Illuminate\Queue\SerializesModels; use Illuminate\Broadcasting\PrivateChannel; use Illuminate\Broadcasting\PresenceChannel; use Illuminate\Foundation\Events\Dispatchable; use Illuminate\Broadcasting\InteractsWithSockets; use Illuminate\Contracts\Broadcasting\ShouldBroadcast; class EbookWasDownloaded { use Dispatchable, InteractsWithSockets, SerializesModels; public $ebook_id; /** * Create a new event instance. * * @return void */ public function __construct($ebook_id) { // $this->ebook_id = $ebook_id; } /** * Get the channels the event should broadcast on. * * @return Channel|array */ public function broadcastOn() { return new PrivateChannel('channel-name'); } } |
I have injected into the constructor $ebook_id variable that we may want to pass to store it in the event for any purposes. You can pass any variable, object you want to keep.
How can we call/dispatch the event ? We can do this very simply in controller side from any actions like below:
namespace App\Http\Controllers; use App\Events\EbookWasDownloaded; use Illuminate\Http\Request; class HomeController extends Controller { public function download($ebook_id) { event(new EbookWasDownloaded($ebook_id)); // some login to fire download } } |
Here we can see that event is fired by calling the helper event with one parameter that is an instance of our event class. Find the section make:listener to know how to listen dispatched events.
make:migration
Let’s say you want to add a new column to existing table. You can do this running the command:
php artisan make:migration add_configuration_brick_file_table

This will create migration file name directly like you put in the command plus prefix with current date. The file will be created with with two empty methods up and down that you need to fill on your own.
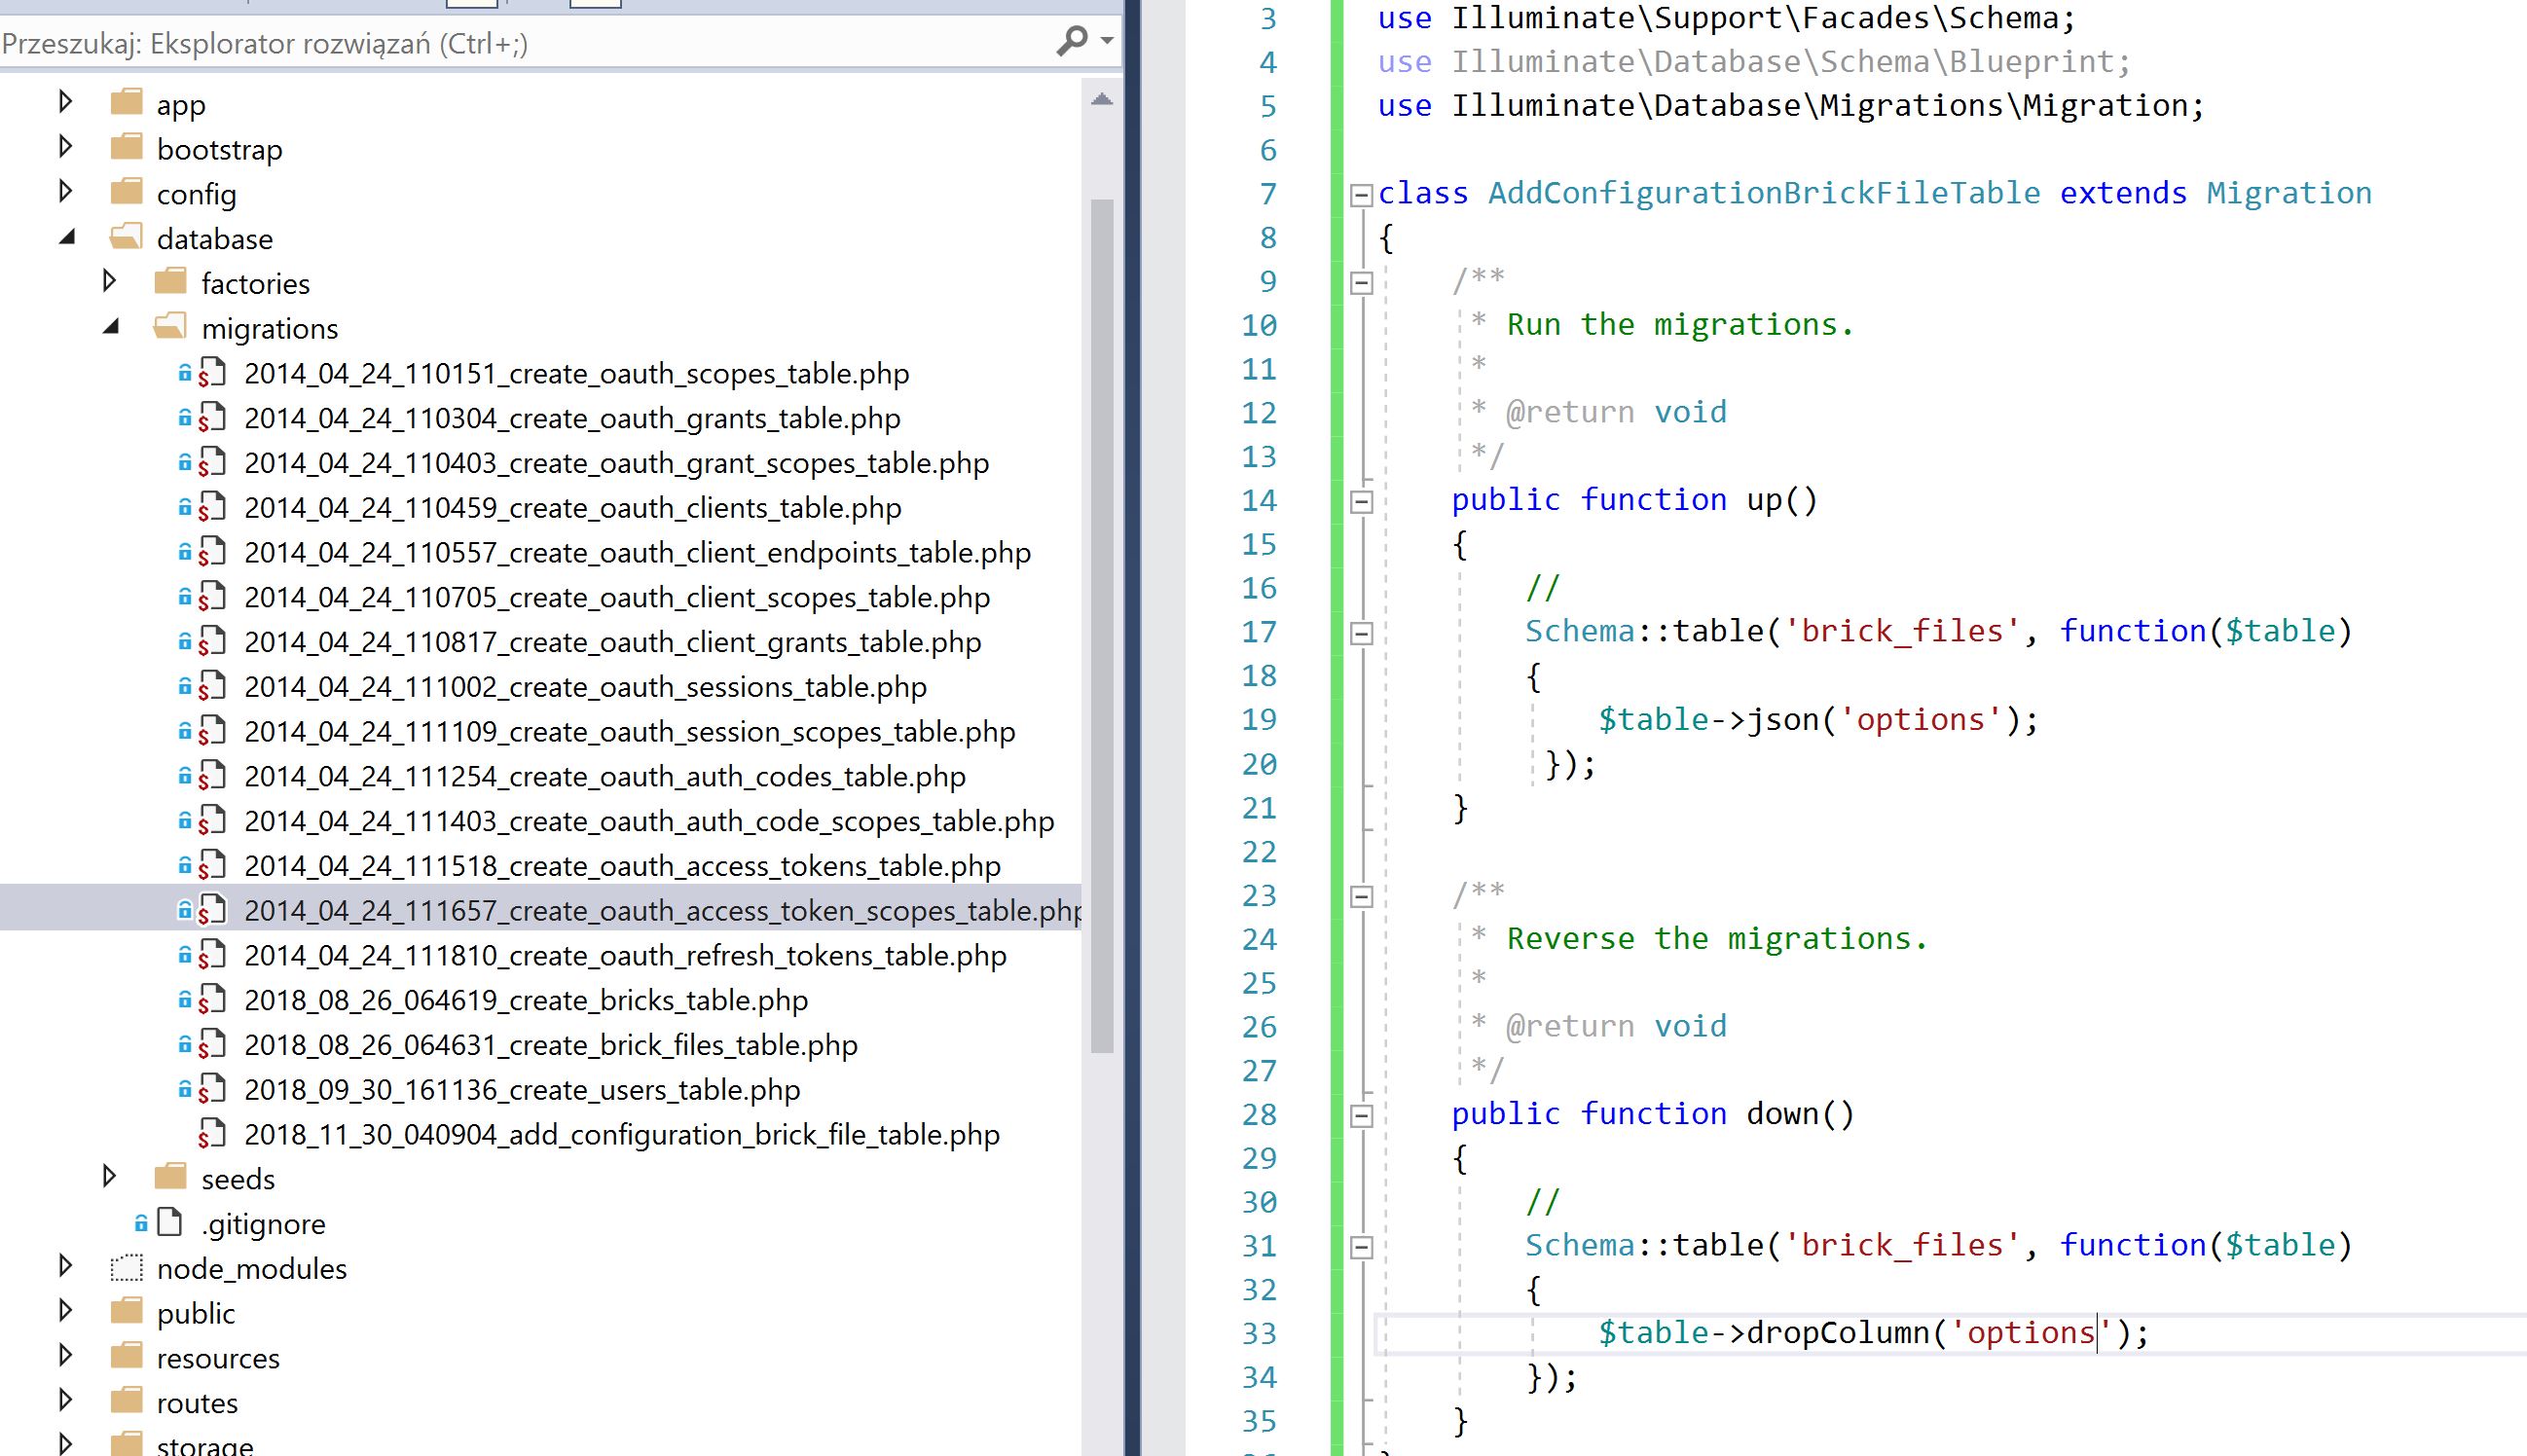
Full list of available column types you can find under the link: laravel migration column types
make:model
In Laravel we have concept of models. They are kind of DTO objects between database side and high level business objects in controllers side (like domain objects used by different servicses/providers).
This small mapping object are ready to use under the command make:model where you only need to put the model name as parameter:
php artisan make:model Book |
As a result the command will create for us a new file under the main app directory named Book.php. You should have the same result like in the picture:
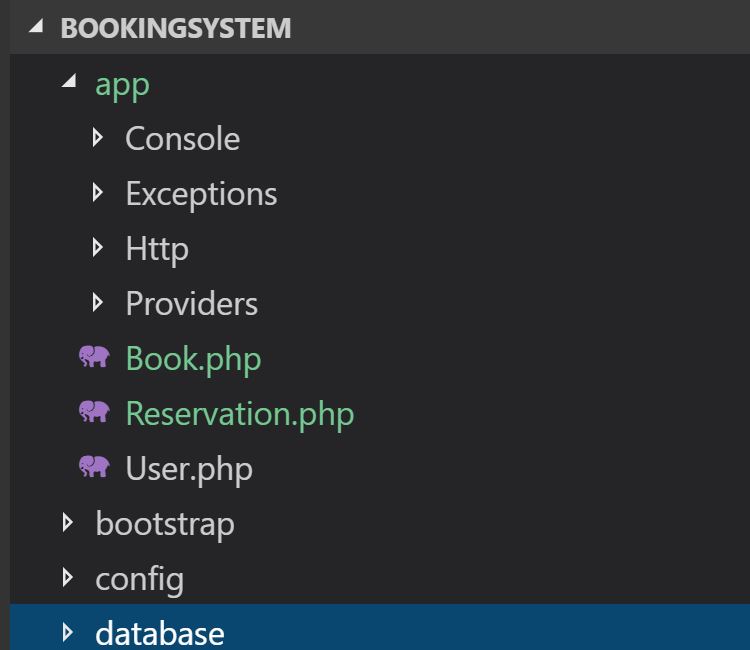
Newly created file is rather empty and you are obliged to fill the two arrays your field/column names from the table that you generate model for:
namespace App; use Illuminate\Database\Eloquent\Model; class Book extends Model { use Notifiable; /** * The attributes that are mass assignable. * * @var array */ protected $fillable = [ 'id', 'title', 'isbn', 'year', 'return_date', 'borrow_data', 'is_available', 'created_date',]; /** * The attributes that should be hidden for arrays. * * @var array */ protected $hidden = [ ]; } |
I filled first of the arrays $fillable with some columns names that fits to book model.
migrate
This command is relatively simple and rather usefull. Using it this way:
php artisan migrate
as a result you can easily make all migrations into database.

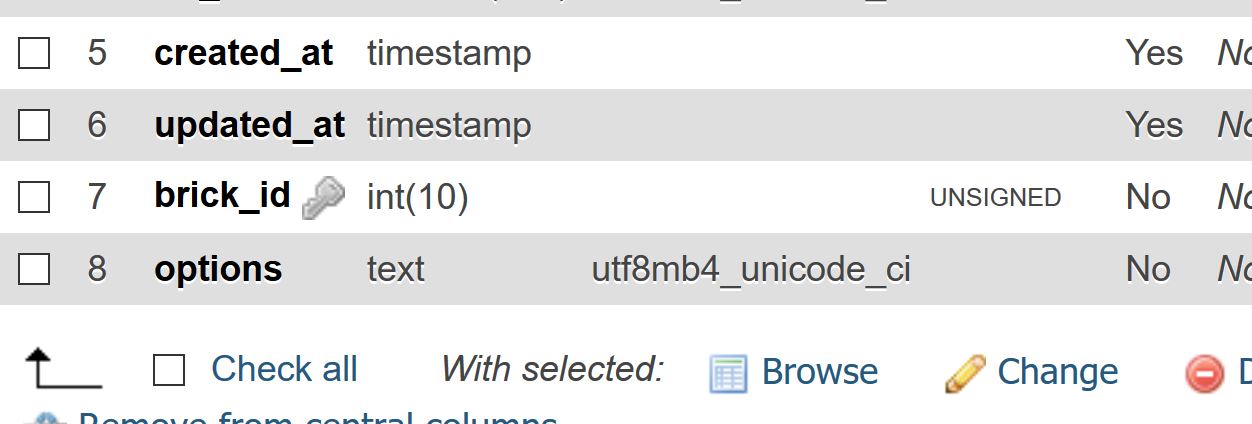
In the example we added new column named options so after running the comand you will see that new column is added into database:
migrate:rollback
It sometimes happens that you made mistake or you want to verify your application with previous version of database structure. It is possible to do by the command migrate:rollback. The command goes one step backward in migration list. When you run the command you will see such result in your console:

migrate:status
Migrate status command gives very important information about state of running migrations. It coresponds with commands migrate:rollback and just migrate, because when you run the command you need to know if they failed or approved. So the migrate:status command shows you the current state:

In Ran column you have presented information Yes or No that means migrations were applied or not. Consequently we have first two migrations successfully applied. The latest migration is waiting to be run.


